In my last post, I talked about the root cause of the filament blob, which not only ruined my print jobs, but also paralyzed my 3d printer. I was able to fix the problem by replacing the entire heating element and nozzle. The cost of the replacement was quite affordable because the replacement kit is available from Amazon for only $24.99, you just have to be patient before the kit can be delivered. What if you’re in a hurry and your print job can’t wait? The solution is in your hand — you already have the replacement kit if you can extract it from the blob.
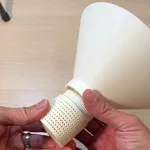
If you followed my previous post, you should be able to detach the blob from the printer head. It is a giant blob of plastic (depending on the filament material) wrapping around your heating element and nozzle. The problem is how to remove the blob and clean the head.
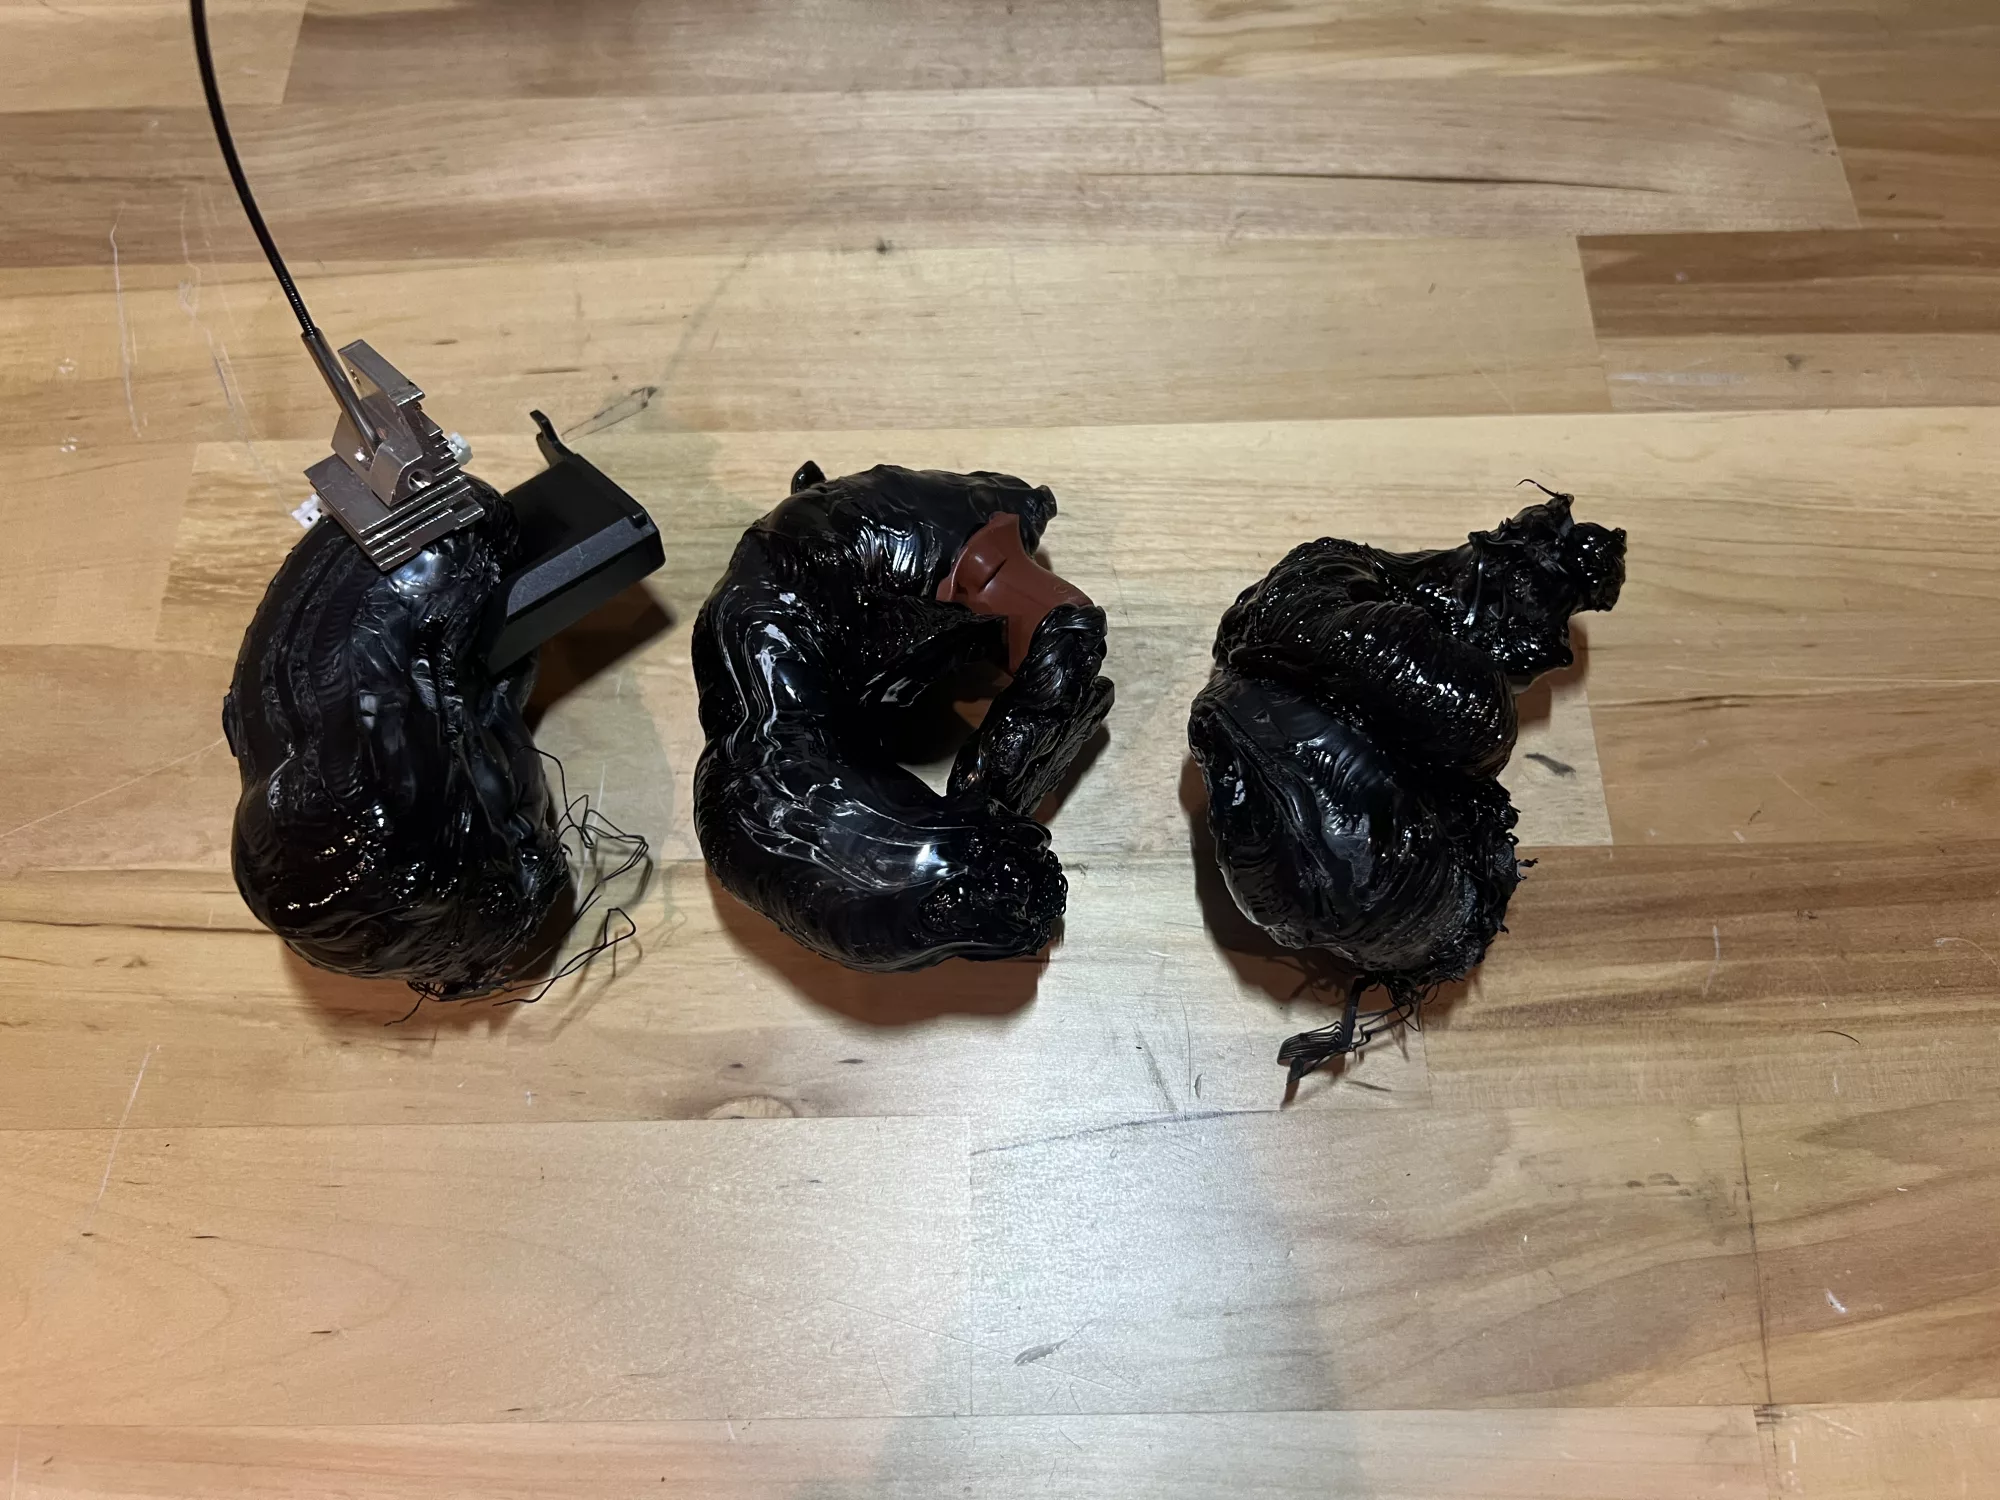
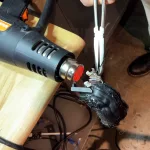
It does look quote impossible at the first glance — rock solid and unbreakable. But remember — it softens under high temperature. If we can heat up the whole blob, there might be a chance to remove it. All you need is a powerful heat gun and to blow the hot air into the blob for quite a while. I purchased mine from Harbor Freight for only $19.99 and it is 1500W!
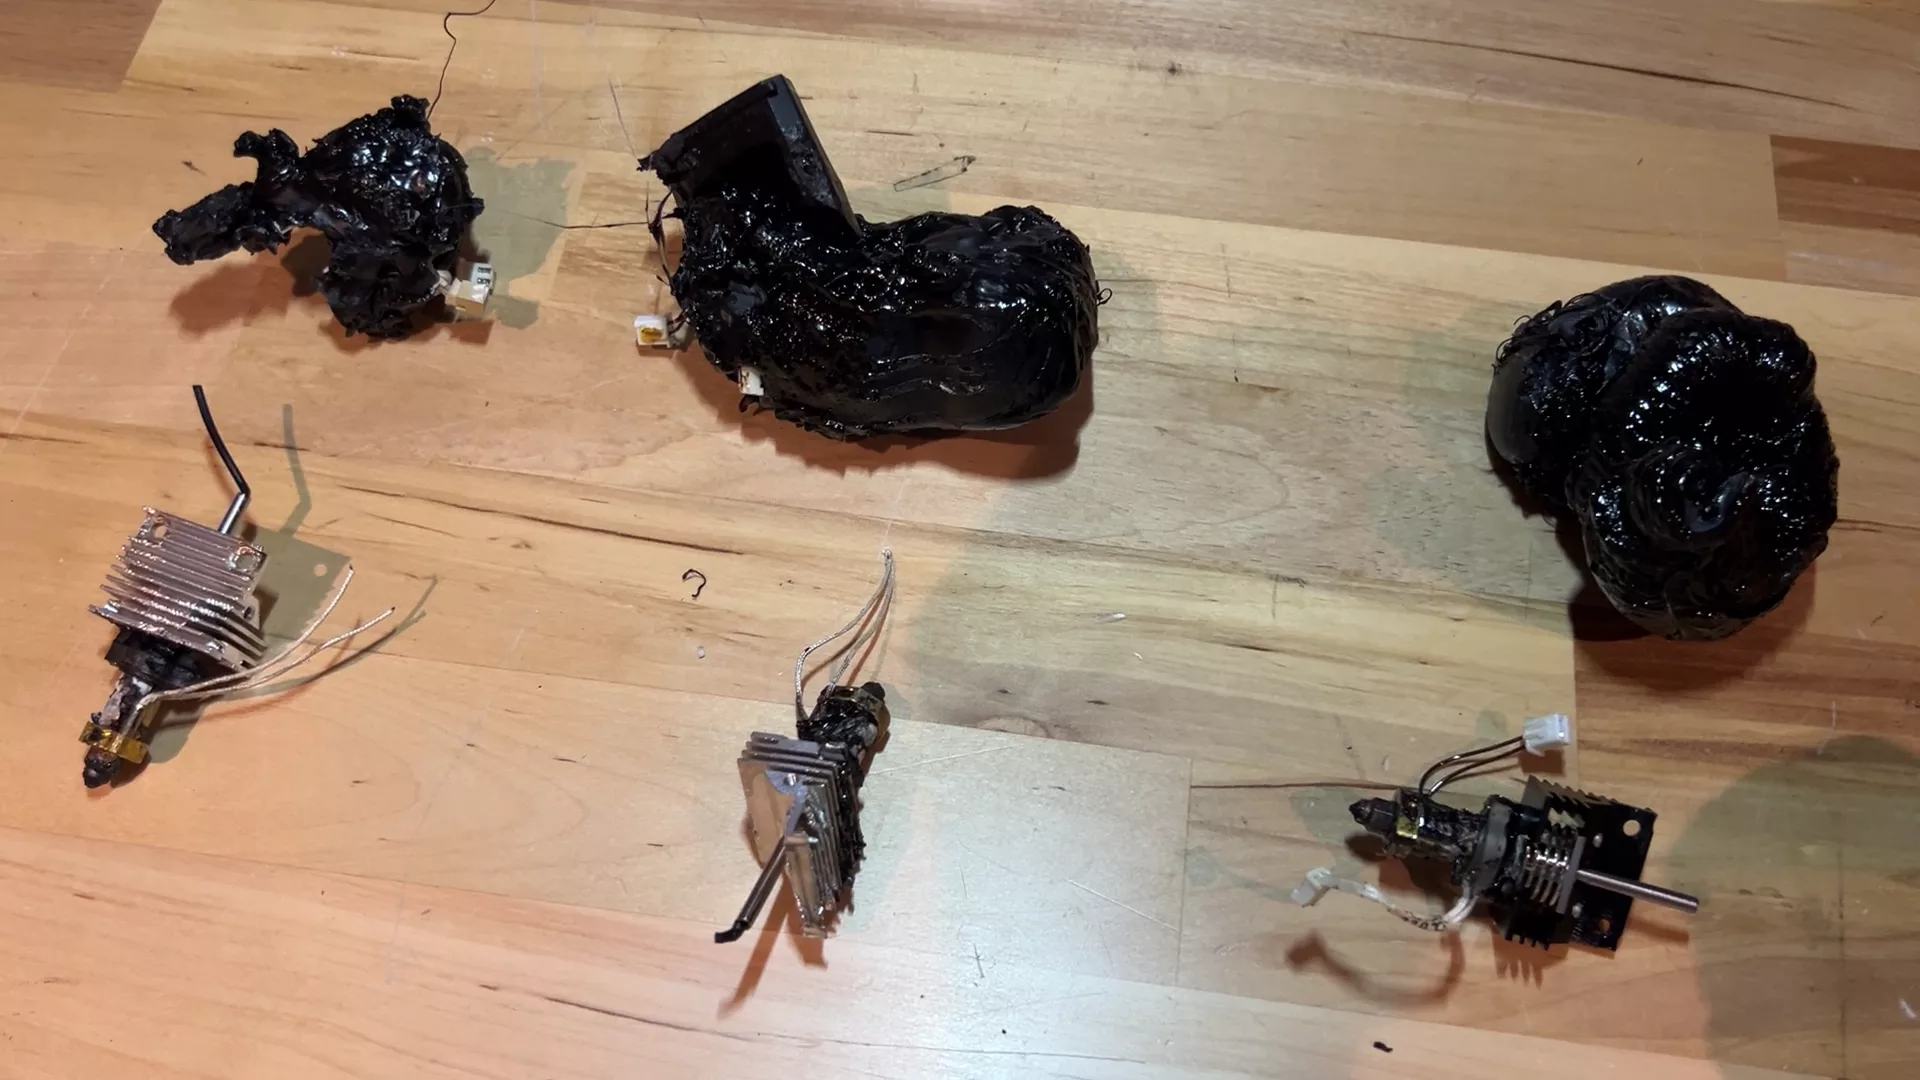
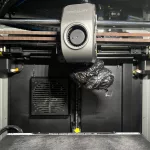
It takes a quite a while to raise the temperature of the blob and become soft enough for removal. As you can see, only the rightmost nozzle is still intact after blob removal; the other two lost their connectors.
Related posts:
Leave a Reply